W3cubDocs
/RethinkDB JavaDeploying with PaaS
RethinkDB can be easily deployed on Compose and Amazon Web Services.
Deploying on Compose
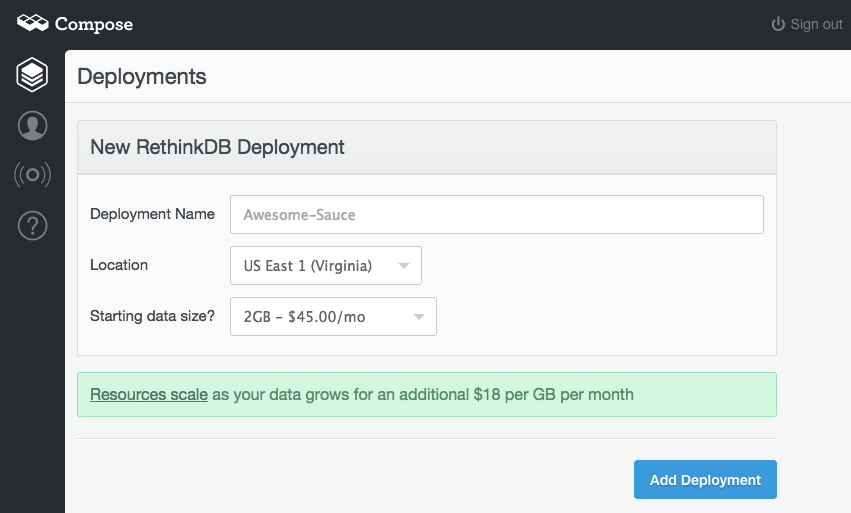
Each deployment provided by Compose is configured as a high-availability cluster with full redundancy. To create a hosted RethinkDB instance:
- Click the “Add Deployment” button in the Compose administration panel.
- Select “RethinkDB.”
- Enter a name for the deployment.

If you haven’t already added billing information to your Compose account, you’ll be prompted to do so before deployment.
You can connect to your hosted cluster on Compose in one of two ways: via SSL or via SSH tunneling. With SSL, you can get a direct Admin URL and driver connection URL to your RethinkDB instance. SSL driver connections are only supported with the official RethinkDB drivers and the community-supported Go driver. For more details, read Compose’s RethinkDB and SSL blog post.
SSH tunneling lets you connect directly to the virtual private network of your RethinkDB cluster. This is more complicated to set up, but lets you work with the hosted RethinkDB instance the same way you’d work with a local installation, and it can work with any community RethinkDB driver. After your RethinkDB deployment is created, the admin console will give you the host and port information that you need to use to set up the SSH tunnel.
Read Compose’s overview of RethinkDB support and their Connecting to RethinkDB documentation for more information.
Deploying on AWS
Launching an instance
The smallest recommended instance type is t2.small. However, t2.micro works for simple tests. Follow these instructions to set up an AMI:
- On the RethinkDB marketplace page, click the Continue button.
- Select the 1-Click Launch tab, select the size of the instance you wish to configure, and click on the Launch with 1-Click button on the right.
- Click on the link Your Software in the upper right. RethinkDB should appear as one of your software subscriptions.
- When the RethinkDB instance is ready, click on its Access Software link.
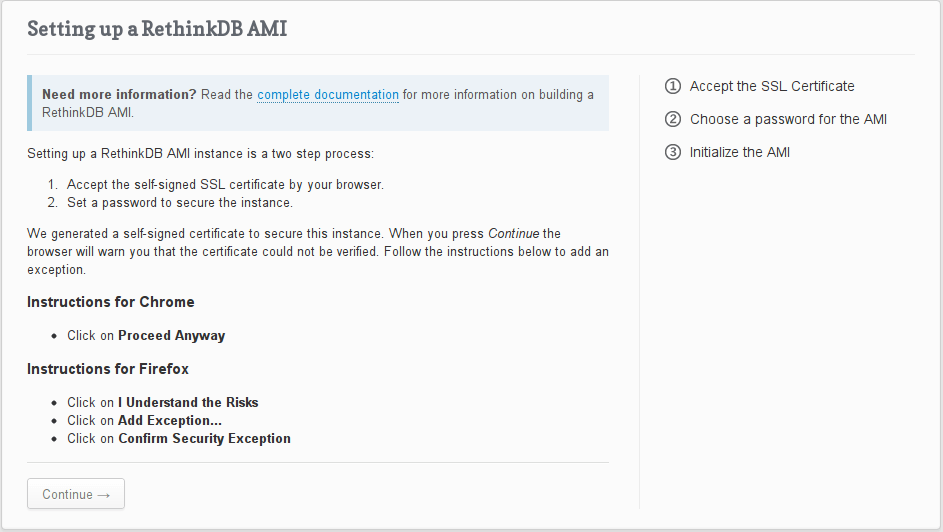
- You should see a “Setting up a RethinkDB AMI” web page. Click on the Continue button to proceed.
- Accept the self-signed SSL certificate. (How to do this is browser-dependent.)
- Choose an AMI password.
- Wait for the instance to initialize.
- Log in using the username
rethinkdband the password you chose in step 7.

Note: RethinkDB uses a self-signed certificate to encrypt your password. You’ll have to accept the self-signed certificate in your browser to access the instance.
AMI configuration
The RethinkDB AMI is preconfigured with the following options:
- Ubuntu Server 12.04 LTS
- RethinkDB server
- Official RethinkDB client drivers for Python, JavaScript, Java, and Ruby
- 5 GB of free EBS space for your data
Note: it is possible to attach more specialized EBS volumes and have RethinkDB store your data on them, but this option is not yet available out of the box. If you manually attach an EBS volume, you can SSH into the instance and edit the configuration file to point RethinkDB to the custom volume. See the cluster setup instructions for more details.
Instance administration
The primary way to administer a RethinkDB AMI is through the web UI. Advanced tasks can be performed with ReQL administration commands, using the Data Explorer interactively or scripting through any RethinkDB driver. Read Administration tools for more details about scripting administration tasks.
SSH access
To connect to your instance over SSH, log in as the user ubuntu. Use the private key you chose during the installation process and the public hostname of the instance. For example:
ssh -i rethinkdb.prv -l ubuntu ec2-184-72-203-271.compute-1.amazonaws.com
Security
The default security group opens 4 ports:
- Port 22 is for SSH. The server uses public key authentication.
- Port 80 is for HTTP. It is used during the setup process but otherwise redirects to HTTPS.
- Port 443 is for HTTPS. An Nginx server sits between RethinkDB and the world and provides basic HTTP authentication and secure HTTPS connections for the web UI.
- Port 28015 is for client driver access. The only form of authentication is a key that is sent in plain text over the network.
To secure your instance more tightly, we recommend that you perform the following steps:
-
Change the admin user password.
Open the RethinkDB Data Explorer in the web UI and execute the following command:
js
  r.db('rethinkdb').table('users').get('admin').update({password: 'newpass'})
Where “newpass” is the new password you want to use.
-
Restrict access to port 28015 to allow only IP addresses or security groups that should have driver access.
Changing the web UI password
To change the password used to access the web UI, log in over SSH and run the following command:
htpasswd /etc/nginx/htpasswd rethinkdb
The htpasswd tool will prompt for your new password.
Set a user account and password for your application
For details about this, read Permissions and user accounts.
Setting up VPC security groups
For added security, you can isolate a multi-node RethinkDB cluster on AWS using a Virtual Private Cloud security group. The default security group settings for RethinkDB allow anyone to connect to the database’s driver port, but exclude the intracluster port. Follow the steps below to set up your security groups.
- Open the Security Groups section of the administration console.
- Select the security group that your instances belong to and open the Inbound tab in the bottom half of the page.
- Note the id of the security group. It will start with
sg-. - Create a new rule to allow instances to connect to one another:
- Select Custom TCP rule.
- Enter “29015” as the port range.
- As the Source, enter the id of the security group (see step 3).
- Click on Add Rule, and Apply rule changes.
After the rule has been applied, connect to your instances over SSH and change the RethinkDB configuration file (/etc/rethinkdb/interfaces.d/default.conf) to join them.
bind=all
join=<IP address>:29015
If you have changed the intracluster port from 29015, use the new number. For more guidance, see RethinkDB’s cluster setup instructions and Amazon’s documentation on Security Groups for your VPC.
© RethinkDB contributors
Licensed under the Creative Commons Attribution-ShareAlike 3.0 Unported License.
https://rethinkdb.com/docs/paas/